Comprehensive Guide: Sketching a Squirrel with Graphite Pencils
This tutorial provides a systematic approach to rendering a realistic squirrel using pencils. To achieve the best results, it is recommended to use a variety of graphite grades, specifically a 4H for light sketching, a 2B for mid-tones, and a 6B for deep shadows and textures.
Published June 2, 2026
Updated June 2, 2026
By Daniel Anderson
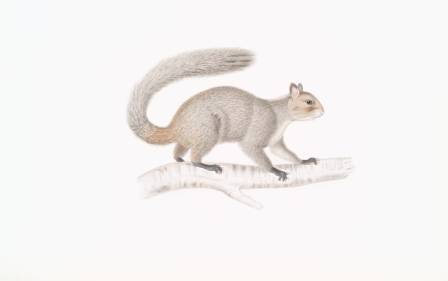
This tutorial provides a systematic approach to rendering a realistic squirrel using pencils. To achieve the best results, it is recommended to use a variety of graphite grades, specifically a 4H for light sketching, a 2B for mid-tones, and a 6B for deep shadows and textures.
Establishing the Primary Structure
The first phase involves creating a light framework for the animal. Begin by sketching the basic shape of the head. It is vital to use very light pressure during this stage, making the lines barely visible so they can be easily adjusted or erased later. Once the head is set, extend a curved line to define the arch of the back, and map out the placement of the front limb and the large thigh of the hind leg.
Continue building the anatomy by drawing the front and back paws. In this composition, the squirrel is perched on a surface, so you should sketch the branch or ground beneath it. Additionally, add a small nut held between its front paws to give the character more life. Finally, illustrate the iconic, voluminous tail and indicate the visible portion of the secondary front paw peeking from behind the body. This completes the foundational skeleton of your drawing.
Adding Features and Initial Textures
With the base established, you can begin focusing on the facial features and the texture of the fur. Start with the eye, filling it in with dark graphite while ensuring you leave a prominent white spot to serve as a light reflection. To create a realistic coat, begin replacing the solid contour lines of the back, hips, and tail with short, dense strokes that mimic hair. When working on the tail, use significantly longer lines to emphasize its characteristic bushiness.
Once the initial layer of fur is mapped out, switch to a softer pencil. Apply a new layer of strokes over the previous ones to build density. During this stage, you should also refine the appearance of the branch the squirrel is sitting on, ensuring it has a natural, wooden texture that complements the subject.
Blending and Highlighting for Realism
The final stage focuses on depth and contrast. Using your fingertip, gently smudge the pencil strokes to create a soft, undercoat effect, being careful to leave the areas around the nose and eyes untouched to maintain clarity. Afterward, use a dark, soft pencil to redefine the edges and increase the saturation of the shaded regions. Add faint, delicate lines to the forehead and around the muzzle to suggest whiskers and fine facial hair. Darken the areas inside the ears and any parts of the body in deep shadow.
To bring out the final highlights, use the edge of an eraser to "draw" thin white lines in the direction of the fur growth. This technique is used to create light patches on the cheeks, elbows, thighs, belly, and tail. After erasing these highlights, lightly soften the boundaries with your finger once more to ensure the transition between light and dark fur appears uniform and natural.